Filmwerkplaats 16mm film introduction workshop

This is a 2-day workshop in 2 parts of approximately 6 hours each day and is an introduction of working according to the d-i-y way of 16mm filming.
Date:
7 & 8 December 2022 10:30-16:30 Wednesday & Thursday
Location:
WORM/Filmwerkplaats, Boomgaardsstraat 71, 3012XA Rotterdam
Costs: 125,- in total, incl. Material
Info: filmwerkplaats@worm.org
The workshop will take place in WORM where our Filmwerkplaats filmlab is located. The Filmwerkplaats is equipped to facilitate individual artists throughout the production process of their films. It’s possible to go from unexposed filmstock to final exhibition print without having to rely on commercial labs or rental companies.
Due to the intensity of this hands-on 16mm introduction workshop the maximum number of participants is 4.
If you are interested in becoming a Filmwerkplaats member this 2-day workshop is essential.
This 16mm film introduction workshop covers a.o.
Day one:
Session 1: the 16mm film camera
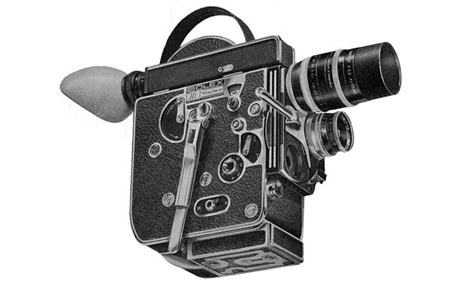
This part will cover using the (Bolex) camera, exposure, light reading and development processes and chemistry. We will use B&W negative film material. You will work with the camera yourself and develop your own film by hand afterward. Included items are a.o. Bolex camera loading, continuous and variable speed shooting, time-lapse & time exposure, lenses wide angle / tele, film sensitivity ISO/ASA/DIN, light measuring, camera speed/exposure time
Short introduction about light measurement with an external light meter, reflecting and incidental light reading, Ansal Adams zone system, and use of middle grey cards.
Session 2: hand processing film
In this part we prepare two B&W developers (D96 and D97) from scratch. Explaining the difference between developer formulas and their usage. Explaining what the function is of the individual components in the chemistry. Giving insight into natural and/or household-based chemistry substitutes. A short introduction on how to load a Russian Lomo developer tank and how to use it for developing film. Practicing individually with loading a Lomo tank. The participants then load their own exposed film in a tank and develop as negative in D96, rinse, fix, wash, and hang to dry.
At the Filmwerkplaats it is possible to digitize your 16mm film with a RetroScan Universal 16/S8 scanner. This part also includes the telecine of the films made during the workshop.
Day two:
Session 3: darkroom/lab printing possibilities
Today you will work in the darkroom and learn about the various ways of contact printing, where images of the first part are used as source material, to create new images. Explaining how the exposure during printing can be controlled by the use of ND filters and how these filters work in stops (0.3 steps). We will work with B&W print film. This specific material makes it possible to work in red safety light. Participants will process the exposed print individual.
Session 4: sound, projection and performance
This part incorporates the uses (and abuses) of film print materials, development processes and chemistry, but also specific possibilities such as creating optical sound by hand, the use of a film splicer (CIR) and the use of our 16mm flatbed editing tables. Including a short introduction on how a 16mm projector works, including loading, focussing, framing and performance. Individual practice with a film projector.